
Matching colors in Photoshop can be one of the most rewarding skills to master. Whether you’re working on a photo manipulation, graphic design, or digital artwork, ensuring color harmony is essential to make your designs visually appealing and professional. Luckily, Adobe Photoshop provides powerful tools and techniques that make color matching easier than ever.
In this article, we’ll explore how to match colors in Photoshop using various tools and methods, ensuring your designs are cohesive and vibrant. You’ll also find tips, step-by-step instructions, and advanced techniques to achieve perfect color consistency.
Why Color Matching is Essential in Design
Colors are more than just visual aesthetics—they convey emotions, set the tone, and can influence how a viewer perceives your design. Inconsistent or clashing colors can ruin an otherwise beautiful composition. Proper color matching ensures harmony between elements, giving your project a polished look.
Whether you’re a professional designer, photographer, or hobbyist, mastering how to match colors in Photoshop can save time, improve your designs, and enhance your workflow.
Basic Tools in Photoshop for Color Matching
To begin learning how to match colors in Photoshop, it’s important to familiarize yourself with some of the essential tools within the software. These tools will form the foundation of your color-matching process.
1. Eyedropper Tool
The Eyedropper Tool is your go-to when it comes to picking up exact color values from different areas of your image. Here’s how you can use it:
- Using the toolbar, choose the Eyedropper Tool, or click the I key on your keyboard.
- Click on the area of your image where you want to sample a color.
- The color will automatically appear in your foreground color swatch, allowing you to use it elsewhere.
This tool helps maintain consistency, especially when working on multi-layered designs.
2. Color Sampler Tool
The Color Sampler Tool works similarly to the Eyedropper Tool but allows you to set up multiple reference points across an image. This is useful for color correction and ensuring uniformity across different parts of an image.
- Select the Color Sampler Tool from the toolbar or press Shift+I.
- Click on different areas of the image to set up reference points.
- The color values will display in the Info Panel for comparison.
3. Color Picker
Photoshop’s Color Picker offers a more manual approach to choosing colors. You can pick a specific hue, adjust saturation and brightness, or enter exact color codes (HEX, RGB) to achieve the precise color you want.
4. Match Color Adjustment
Photoshop’s Match Color command is one of the most effective methods to match colors between different images or layers. This feature automatically adjusts the colors of one layer to make it look more like another.
How to Match Colors in Photoshop: Step-by-Step Guide
Now that you’re familiar with the basic tools, let’s dive into some practical methods to achieve accurate color matching. Below are detailed steps that you can follow to match colors across different elements or images.
Method 1: Using the Match Color Command

The Match Color command is one of the simplest ways to make one image or layer’s color match another. It’s particularly useful for photomontages where you want different elements to look cohesive.
- Open both images in Photoshop.
- Select the image whose color you want to change.
- Go to Image > Adjustments > Match Color.
- In the Match Color dialog box, select the second image (the one with the desired color) from the Source dropdown menu.
- Adjust the Luminance and Color Intensity sliders to fine-tune the results.
- Click OK to apply the effect.
By following these steps, you can easily match the color tone of one image to another, giving them a cohesive look.
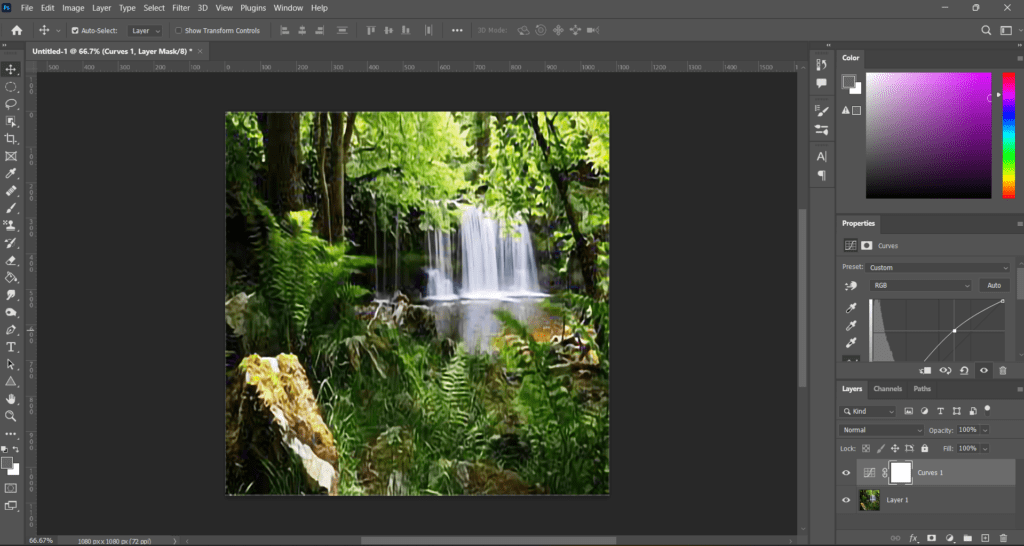
Method 2: Using the Curves Adjustment Layer
For a more controlled approach, you can use the Curves Adjustment Layer to tweak color channels individually. This method gives you the freedom to precisely adjust the Red, Green, and Blue (RGB) channels.
- Select the image or layer you want to adjust.
- Go to Layer > New Adjustment Layer > Curves.
- In the Curves panel, choose the channel you want to adjust (RGB, Red, Green, or Blue).
- Drag the curve to increase or decrease brightness and contrast within each channel.
- Fine-tune the curves until your colors match perfectly.
This method allows for more nuanced color correction, ideal for advanced users.
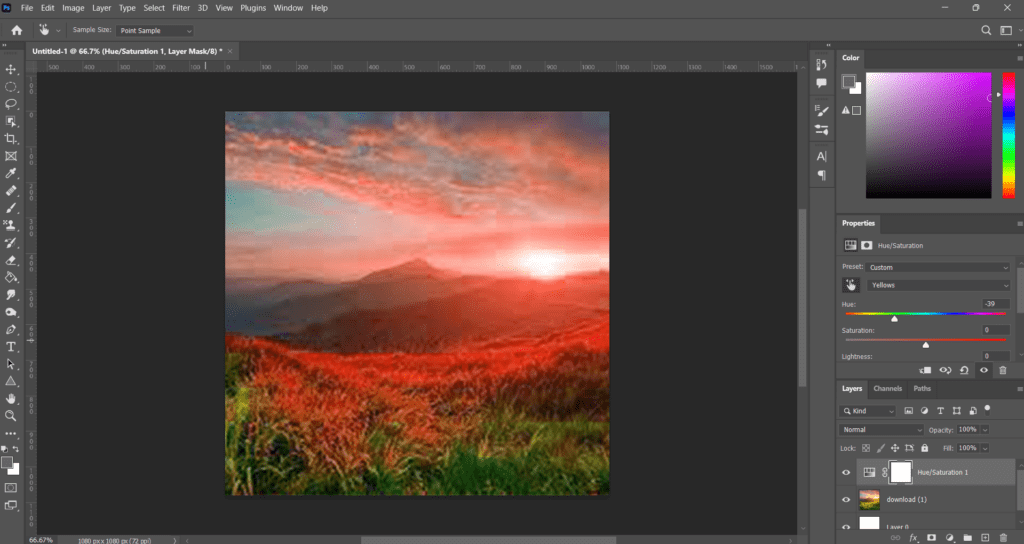
Method 3: Using the Hue/Saturation Adjustment
The Hue/Saturation adjustment layer is a quick way to change the overall hue or saturation of a particular area of your image. You can also adjust individual color ranges (e.g., Reds, Greens, Blues) for more targeted color changes.
- Select the layer you want to adjust.
- Go to Layer > New Adjustment Layer > Hue/Saturation.
- In the Hue/Saturation panel, use the sliders to adjust the Hue, Saturation, and Lightness.
- If you want to adjust specific colors, choose a color range from the dropdown menu and make the necessary adjustments.
This technique is especially helpful for making subtle adjustments to color tones without altering the overall contrast.
Advanced Color Matching Techniques
For more complex projects, consider the following advanced techniques for color matching in Photoshop.
Using Gradient Maps
Gradient maps offer an alternative approach to color matching by mapping a gradient of colors onto the tonal values of your image. This is particularly useful for creating stylized effects or achieving a specific color theme.
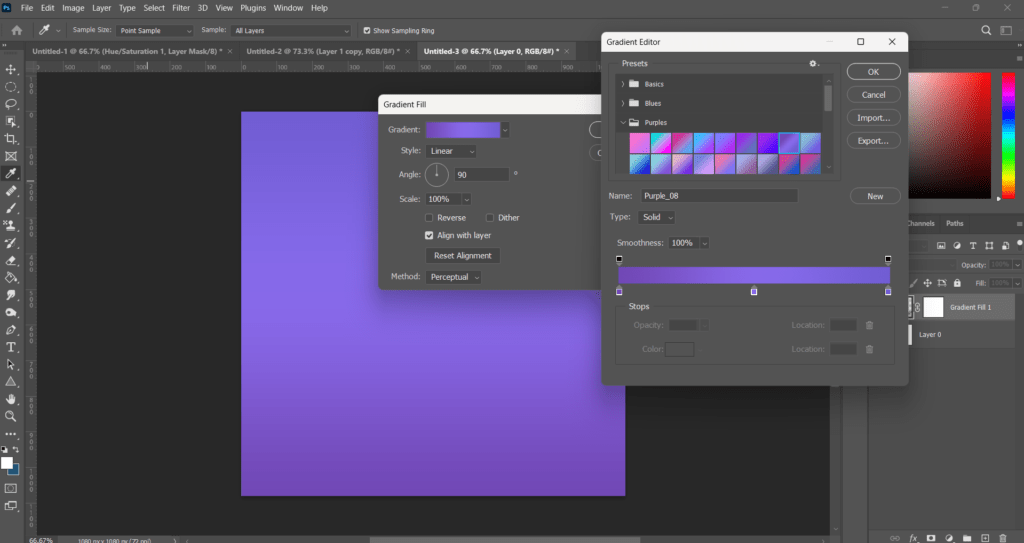
- Go to Layer > New Adjustment Layer > Gradient Map.
- In the Gradient Map dialog, choose or create a gradient that fits the color scheme you want.
- Adjust the blend mode of the Gradient Map layer (e.g., Soft Light, Overlay) to blend the colors seamlessly into the image.
Blending Modes
Blending modes can significantly affect how layers interact with each other in terms of color. For example, using the Color blending mode allows you to apply the hue of one layer without affecting the brightness and contrast of the other.
- Select the layer whose color you want to adjust.
- In the Layers panel, choose the Color blending mode from the dropdown menu.
- Adjust opacity as necessary to blend the colors smoothly.
Tips for Perfecting Color Matching in Photoshop
Now that you know how to match colors in Photoshop, here are some additional tips to help refine your technique:
- Consistency is key: Make sure the colors across all elements of your design are consistent to avoid clashing visuals.
- Use adjustment layers: Non-destructive editing through adjustment layers ensures you can always revert or fine-tune your adjustments.
- Monitor calibration: Ensure your monitor is calibrated correctly, as color perception can differ across screens.
Conclusion
Mastering how to match colors in Photoshop is an essential skill for any designer or photographer. By using tools like the Eyedropper, Color Sampler, Curves, and Match Color commands, you can ensure color harmony across your projects. Whether you’re working with multi-layer compositions or trying to blend different images seamlessly, Photoshop provides all the necessary tools to get the job done.
Remember, practice makes perfect, and the more you experiment with these color-matching techniques, the more confident and proficient you’ll become. Now that you have a solid foundation, why not start experimenting with your own designs?


